Running Blink
In this lesson, we will be learning how to load and debug a single AVR system binary. This is the simplest use of xatdb. The ability to debug a single simple program is useful when you suspect a simple logic error is causing problems in your code.
File Formats
xatdb allows the user to load one of 3 file formats:
- an elf executable - The most useful way to load a single program for debugging (the format we will use in this lesson).
- a Motorola SREC formated image - A simple format which includes no debugging or symbol information. This format should only be used if a simulation (without debugging) is desired or you do not have an elf executable available.
- a "run" file - This format allows xatdb to load many executables of either of the above types. This format is explained in the next lesson next lesson.
Compiling Blink and Starting xatdb
For this lesson we will be using the TinyOS example Blink. First, we compile Blink for the mica2 platform (the default hardware configuration for the emulator, but that will be discussed later):
[dblaze@easymac dblaze] cd /usr/local/src/tinyos-1.x/apps/Blink
[dblaze@easymac Blink] ls
Blink.nc   BlinkM.nc  CVS        Makefile   README     build
[dblaze@easymac Blink] make mica2
    compiling Blink to a mica2 binary
ncc -o build/mica2/main.exe -O0 -gstabs+ -board=micasb -target=mica2 -Wall
-Wshadow -DDEF_TOS_AM_GROUP=0x7d -finline-limit=100000
-fnesc-cfile=build/mica2/app.c  Blink.nc -lm
    compiled Blink to build/mica2/main.exe
            3850 bytes in ROM
              36 bytes in RAM
avr-objcopy --output-target=srec build/mica2/main.exe build/mica2/main.srec
avr-objdump -d build/mica2/main.exe > build/mica2/main.s
[dblaze@easymac Blink] cp build/mica2/main.exe ~/atemu/xatemu/apps/
Make sure that you see the "-O0" and the "-gstabs+" switches when you compile your application. If not, modify the file Makerules that is included with TinyOS to include these switches and build again.
Once you have the Blink executable and know where it is, starting up xatdb is easy:
[dblaze@easymac xatdb] cd ~/atemu/xatdb
[dblaze@easymac xatdb] ./xatdb
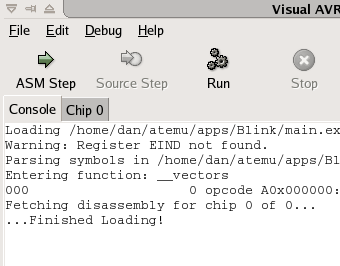
Once xatdb has started up, we need to tell it which executable to load. Click File->Open, then find and select the Blink elf file from the dialog. Once you have selected your file, the loading will begin. This release takes a bit of time to load executables -- on a 333MHz Sun Ultra 10, it takes about 5-10 seconds to load. Please be patient and wait for a "Loading Finished" message to be displayed in the Console tab. Once this message is displayed, xatdb is ready for commands.
A Brief Overview of the User Interface
 First, select the "Chip 0" tab. In later lessons, these tabs are used to
switch between the different AVR emulations currently running. Each tab
contains its own set of information describing the state of that chip.
The "Console" tab contains a single window used to display messages directly
from the emulator, you can safely ignore these for now.
First, select the "Chip 0" tab. In later lessons, these tabs are used to
switch between the different AVR emulations currently running. Each tab
contains its own set of information describing the state of that chip.
The "Console" tab contains a single window used to display messages directly
from the emulator, you can safely ignore these for now.
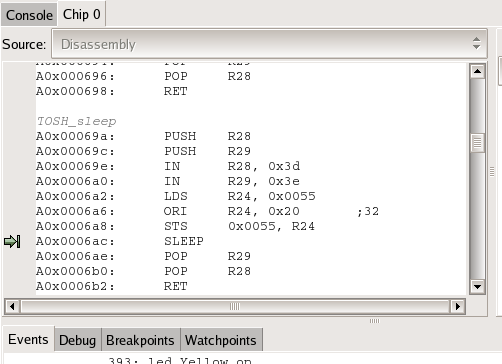 Here you see the upper left portion of a chip tab. The drop-down menu allows
selection of the assembly view of the executable or the various Source
files used to compile the executable. When using an elf executable, a green
arrow points to the source file corresponding to execution in the
drop-down menu.
Here you see the upper left portion of a chip tab. The drop-down menu allows
selection of the assembly view of the executable or the various Source
files used to compile the executable. When using an elf executable, a green
arrow points to the source file corresponding to execution in the
drop-down menu.
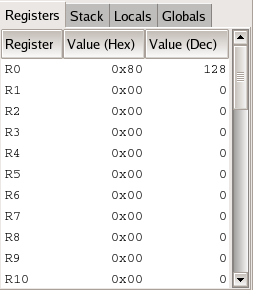 Here you see the upper right portion of a chip tab. Each tab in this
section contains useful information about the state of the processor.
It contains a list of hardware registers and their values, the current
call stack, local variables and their possible values, and global
variables and their values. The values of these tabs will change with
each step of the debugger and when the execution of the simulated
processor is interrupted.
Here you see the upper right portion of a chip tab. Each tab in this
section contains useful information about the state of the processor.
It contains a list of hardware registers and their values, the current
call stack, local variables and their possible values, and global
variables and their values. The values of these tabs will change with
each step of the debugger and when the execution of the simulated
processor is interrupted.
 The bottom tabs relay important information from the emulator. The tabs labeled
"Events" and "Debug" relay information about the current processor (chip) you
have selected. Events usually displays information from the devices attached
to the chip, like the three LEDs attached in the Mica2 configuration. The debug
information is useful for those who want to develop new simulated devices to
attach to the processor. Simulated devices can print various debugging
information to this tab's window. The other two tabs, "Watchpoints" and
"Breakpoints", maintain a list of current breakpoints and watchpoints that
the user has set. These will be explained later.
The bottom tabs relay important information from the emulator. The tabs labeled
"Events" and "Debug" relay information about the current processor (chip) you
have selected. Events usually displays information from the devices attached
to the chip, like the three LEDs attached in the Mica2 configuration. The debug
information is useful for those who want to develop new simulated devices to
attach to the processor. Simulated devices can print various debugging
information to this tab's window. The other two tabs, "Watchpoints" and
"Breakpoints", maintain a list of current breakpoints and watchpoints that
the user has set. These will be explained later.
Now that we have an overview of the interface, we can begin using it.
Stepping through Blink
The first feature to learn is the single cycle "Step". Each click of the step button will advance all emulated processors a single cycle. Note that this may not advance the PC (Program Counter); some instructions take more than a single cycle to execute. Try using this feature to step 20 or so cycles into our Blink executable.
Moving through Blink (another way, or two)
You may notice that stepping a processor cycle by cycle is going to take a lot of time to accomplish anything useful. Single stepping is to be used after locating the area of a problem. Two other ways to advance the emulation are "Source-Step"-ping or setting a breakpoint and "Run"-ing.
All of the applications we write for the Mica2 platform have been written with nesC, a modular language used in conjunction with TinyOS. We realized that stepping between C style statements would be a useful feature. This feature is very similar to the single cycle stepping as described above. However, this feature is only available if the program was compiled with debugging symbols on.
First, make sure you have a source file selected instead of the "Disassembly" in the "Source" drop-down menu. Click the "Source Step" button. The next line to be executed is now indicated by a green arrow to the left. Also note that the correct source file is selected. Use this feature to continue to step through some of the Blink code.
After using Source stepping to step through the Blink executable, it becomes apparent that it could still take a long time to get to the portion of code you would like to inspect. The use of breakpoints solve this problem. Breakpoints allow you to specify an address in the code for execution to stop at whenever it is reached.
There are 3 ways to set a breakpoint somewhere in the executable:
- by right clicking to bring up a menu on the disassembly view.
- by right clicking to bring up a menu on the source code view.
- by clicking "Add Breakpoint at..." located in the debug menu. This brings up a dialog allowing you to set a breakpoint on a specified hexadecimal address. You can set this breakpoint on all chips or just a single chip.
Setting a breakpoint through specifying an address or right clicking in the Disassembly causes a red circle to appear to the left of the associated line in disassembly view. Otherwise, setting from the Source file view causes a red circle to appear to the left of the line in the corresponding Source file.
Now that your desired breakpoint has been set, click the "Run" button. This button causes the emulation to continue until a breakpoint has been hit on any executable. Remember, if you are debugging multiple executables, a breakpoint being hit on any executable will halt all execution.